
Astrbot is arguably the most comprehensive solution for deploying a personal, cloud-based AI service across various messaging platforms, offering the widest range of platform support. So, this article will serve as a beginner-friendly, step-by-step guide on how to deploy it! If you are on Windows, please skip this installation guide and scroll down to Installation on Windows.
Recommended specs: 2 Cores, 4GB RAM, overseas server.
Project GitHub Source: https://github.com/AstrBotDevs/AstrBot
Below is the Linux installation tutorial. I am using Debian 12. If you are on Ubuntu, the commands are exactly the same. The project highly recommends deploying on a remote Linux server if you want to connect it to multiple messaging platforms and need it to run 24/7. First, run this command to install Git (if you haven't already):
apt install git
Then, clone the project repository:
git clone [https://github.com/AstrBotDevs/AstrBot.git](https://github.com/AstrBotDevs/AstrBot.git)
Navigate to the project folder:
cd AstrBot
Install the uv project manager:
wget -qO- [https://astral.sh/uv/install.sh](https://astral.sh/uv/install.sh) | sh
Use uv to install the required dependencies for Astrbot:
uv sync
uv run main.py
After that, the project will start successfully. The default port is 6185. You can access it in your browser at:
http://[Your Server's IP Address]:6185
The default login username and password are both astrbot. It is highly recommended to change this to a strong password to prevent brute-force attacks. At this point, the deployment is successfully completed. You can now scroll down to the Configuration Tutorial section below.
Besides direct installation, you can also install Astrbot on a Linux server using Docker, which is much more hassle-free. Use this one-click Docker installation script. Docker is a container system that allows various projects to run independently in containers, isolating environments while making deployment and configuration a breeze:
sudo wget -qO- [https://get.docker.com/](https://get.docker.com/) | bash
After executing this command, if you see an output similar to the following, the installation was successful:
$ docker --version
Docker version 18.06.1-ce, build e68fc7a
Use the Astrbot Docker installation commands:
git clone [https://github.com/AstrBotDevs/AstrBot](https://github.com/AstrBotDevs/AstrBot)
cd AstrBot
Then execute:
sudo docker compose up -d
If you using Windows, go to download: https://github.com/AstrBotDevs/AstrBot-desktop/releases/download/v4.23.0-beta.1/AstrBot_4.23.0-beta.1_windows_amd64_setup.exe
Once the installation is complete, you'll need to configure a few things to start using it. I'll only cover basic configuration here; for advanced settings, please refer to the official documentation.
First, you need to navigate to Model Providers - Chat - Add. Then, you'll need to find an API provider yourself (if you're a newbie, you can search online to understand the concept). You can register as an NVIDIA developer to use their free API, though the performance isn't the best. You can also register on SiliconFlow; passing their real-name verification grants you roughly ten-plus RMB in free credits, which is enough for hundreds of conversation turns.
Next, fill in the information. The ID is usually the provider's English name. You need to copy the API Key from your chosen provider and paste it here. Then, click Get Model List, pick the model you want to use, toggle the switch on, and test the connection.
Before using it, make sure you carefully check the pricing at your API provider to avoid excessively high charges.
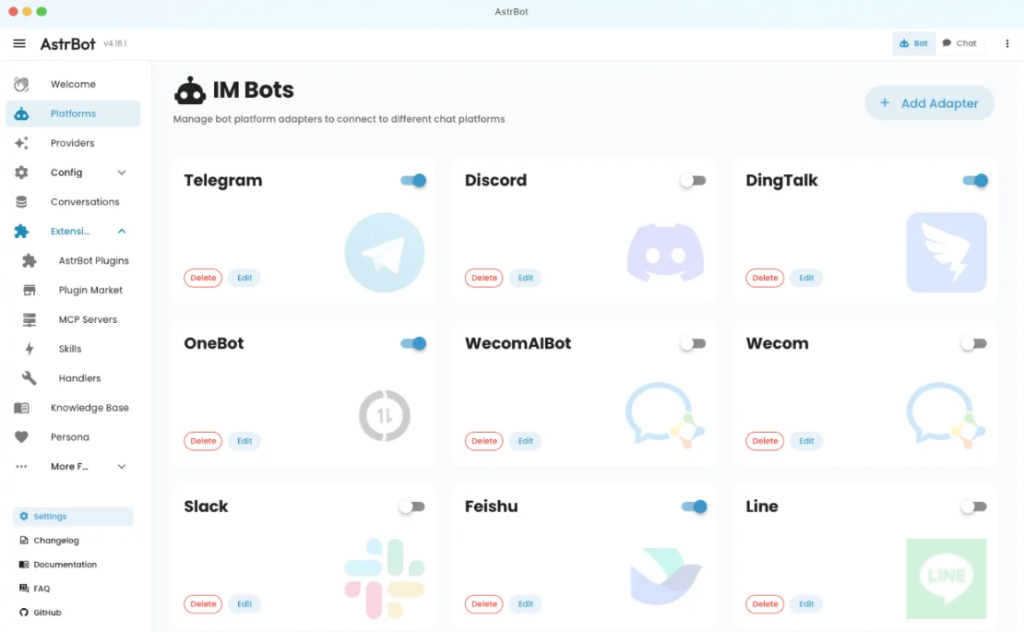
After configuring the provider, go back to the left sidebar and select "Bots". I will use Telegram as an example here, and I highly recommend using Telegram. If you wish to deploy on other platforms, you might need to install additional things (e.g., QQ requires NapCat). Click "Create Bot" in the upper right corner, and select Telegram as the messaging platform. For the Bot Token, head over to Telegram and send a private message to this bot: https://t.me/BotFather, then enter the command /newbot. Sequentially enter your Bot's name and your Bot's Telegram username until it replies with Done! Congratulations on your new bot. You can then copy the long HTTP API string below that message and paste it in. Be careful not to leak your API key. You don't need to change anything else after that. Scroll down to the config files section at the very bottom, choose to create a new config file, give it a random name, and hit save.
Navigate to Configuration File - General Config. Select the config file you just created. For the default chat model, select the API provider you just filled in (e.g., SiliconFlow). The "Persona" is your system prompt; I strongly recommend setting this up (creating a custom AI). You can find various character cards I've written on my blog, look for them online, or write your own to make the AI roleplay or have a unique personality. Scroll down further: you can enable streaming output (which Telegram supports). Enabling the display of the AI's "thought process" is up to your preference.
Regarding Context Management: Configuring this can save you a ton on Token consumption. If your API charges pay-as-you-go (like SiliconFlow), you can set a maximum of 100 conversation turns or fewer, because the more the AI remembers, the more Tokens it consumes.
Health/Safety Mode: If you are only using it for yourself, I recommend turning this off. However, if many people will be using it, you should turn it on, otherwise, your account might get banned by the provider (since it violates terms, especially with domestic API providers).
So far, we've only configured the AI settings. For the Platform Config, set the Admin ID to your personal Telegram ID. You can get this by messaging an ID bot, such as https://t.me/userinfobot. Once you enter your ID, you will have admin privileges to adjust the Bot's functions directly within Telegram. Enable other features as needed; turn off keyword detection. It gets really fun if you pull the bot into a Telegram group. In this case, you can configure the extended features to enable context awareness and proactive replies. However, this consumes a massive amount of Tokens, and the AI will occasionally pop up to chat with group members on its own!
Once you hit save, you've completed the basic deployment of Astrbot! If I have time later, I'll write up some recommendations for MCPs and Skills.
Comments NOTHING